Laser Engraving Tumblers: Rotary Setup, Wrap Sizing and Settings
How to laser engrave tumblers: which laser marks powder coat or bare steel, LightBurn rotary setup, tapered cups, wrap sizing, settings and pricing.
By Depthue Lab10 min read
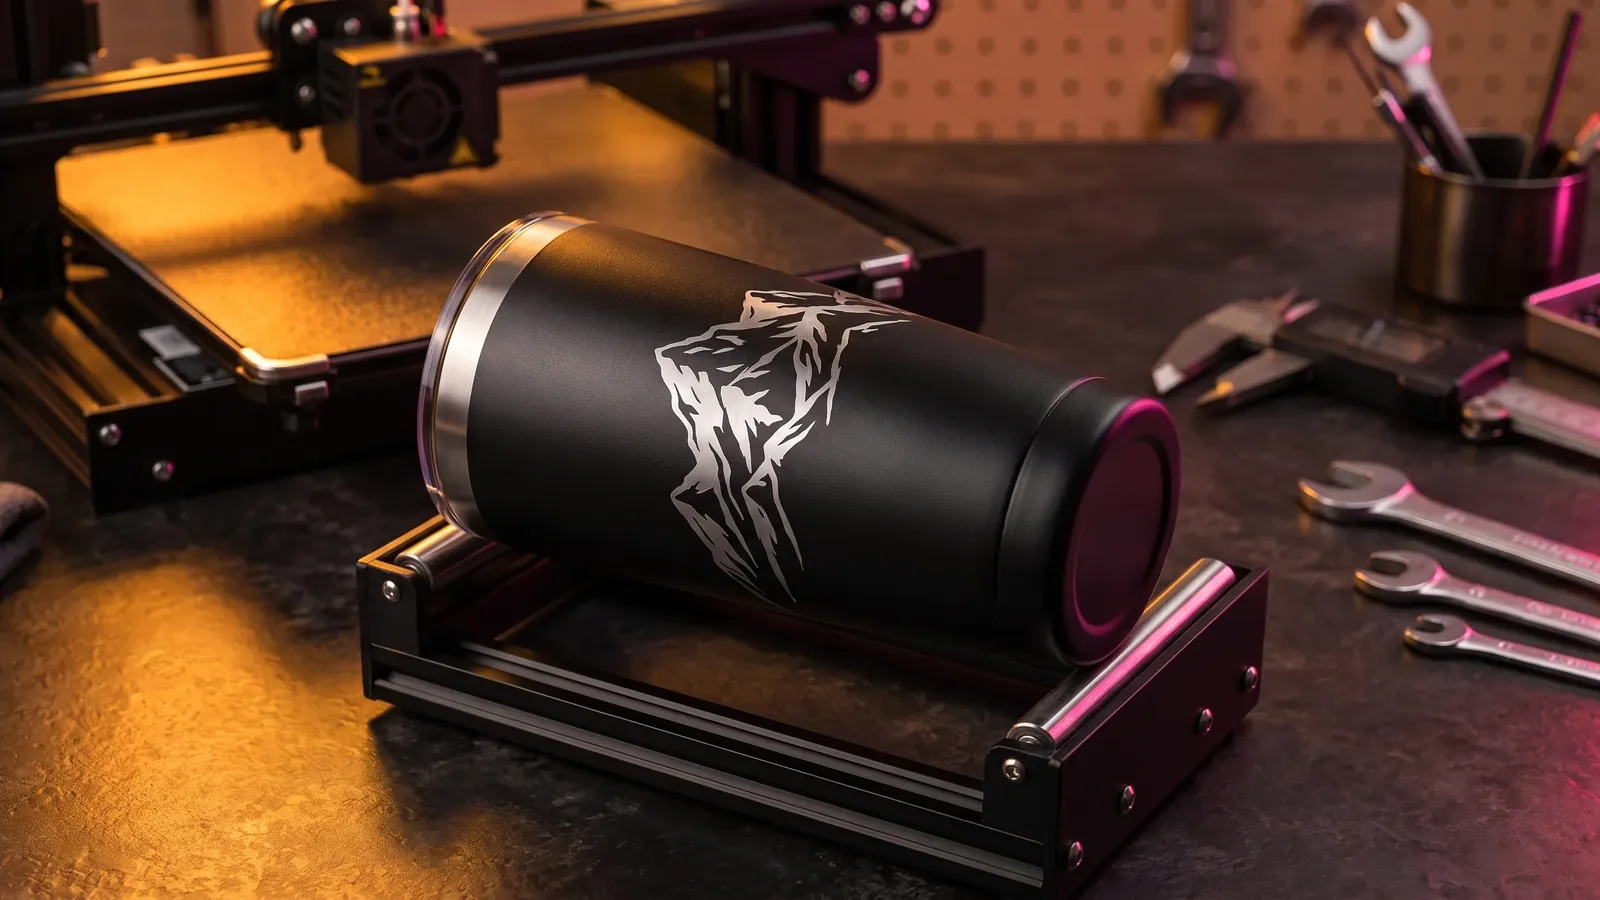
Laser engraving a tumbler means burning away its powder coat to show the stainless steel underneath, or marking bare steel directly. Diode, CO2 and fiber lasers all remove powder coat; only a fiber laser gives a clean dark mark on bare stainless without help. You also need a rotary attachment, the cup's measured diameter in your software, and a test on a spare cup of the same brand and color.
Powder coat or bare steel: what each laser does
Powder coat is a very fine plastic powder, electrostatically attracted to the metal and baked into a hard layer (xTool). Engraving removes that layer along your design, and the steel underneath forms the image. Bare stainless has no layer to remove, so the laser has to change the steel itself.
| Laser | Powder-coated tumbler | Bare stainless tumbler |
|---|---|---|
| Diode (blue) | Removes the coat | Light etch or heat tint; a marking compound for a crisp black mark |
| CO2 | Removes the coat | Needs a marking spray, because bare metal reflects the beam |
| Fiber | Removes the coat | Marks directly: a dark anneal or a deep engrave |
xTool's tumbler buyer guide says a powder coat "can be directly engraved by a fiber, diode or CO2 laser engraver," and that stainless reflects a CO2 beam, so CO2 needs a temporary coating such as tempera paint or marking spray. OMTech puts the CO2 minimum for its marking spray at 25 W and says a low-wattage diode smudges the spray.
The sources disagree on diodes and bare steel. xTool says a blue diode can etch stainless, though low-power modules may need several passes or a marking spray for a darker mark. OMTech says a 445 nm diode reflects off bare stainless and recommends a bonding compound such as CerMark for a crisp black mark; without one, a slow pass gives only a gold or blue heat tint. Expect a diode to need help on bare steel.
Yeti and other branded cups
xTool notes that Yeti drinkware is usually coated, so it engraves like any powder-coated cup. Coats differ by brand and color, though. On the LightBurn forum, one fiber user found Yeti's "thicker skin" needs more power and slower movement than cheaper cups (August 2024), and another said a white Yeti nearly burned at the settings he used on a navy one (August 2022). Treat every brand and color as a new material with its own test.
Which laser to buy for tumbler work
There is no single best laser engraver for tumblers. It depends on what you sell:
- Powder-coated cups only, low volume: a diode laser with a rotary. xTool calls diodes generally the cheapest tumbler machines.
- Bare stainless too, or volume: a fiber laser. OMTech says 20 to 50 W fiber lasers engrave coated and uncoated stainless without marking spray and work much faster than CO2.
- Glass, ceramic and plastic cups too: a CO2 laser with a rotary. xTool calls CO2 the preferred choice for non-metal drinkware. Bare steel then needs spray.
Whatever you choose, check that the machine supports a rotary and that it has enough depth under the head for the rotary plus your tallest cup (OMTech).
Rotary: roller, chuck or four-wheel
| Type | Holds the cup by | Good for | Watch out for |
|---|---|---|---|
| Roller | Resting on driven rollers | Straight cups, fast setup | Slipping; handles get in the way |
| Chuck | Jaws on the rim or body | Handles, odd shapes, exact rotation | Steel jaws scratch, so add heat-shrink tubing |
| Four-wheel | Two adjustable pairs of wheels | Tapered cups: raise one pair to level the slope | Less grip control than a chuck |
xTool says roller rotaries only suit regular cylinders and irregular shapes need a chuck. OMTech adds that a roller relies on friction, so a slip misaligns the design, and it does not recommend second passes on rollers.
Rotary setup in LightBurn
- Open Laser Tools, Rotary Setup (Ctrl or Cmd + Shift + R). Choose Chuck or Roller and switch on Enable Rotary.
- Set the Rotary Axis: Y if you moved the Y motor cable to the rotary, A or Z if your controller has a rotary port. Ruida controllers usually use Y.
- Enter the rotary maker's Steps Per Rotation (Ruida) or MM Per Rotation (GRBL and other GCode lasers). Press Test: the rotary should turn a full 360 degrees, pause and return. Lower the value if it overshoots, raise it if it falls short. On a roller, watch the driven roller, not the cup.
- On a roller, enter the Roller Diameter once. On a chuck, enter the Object Diameter from calipers and update it every time the cup changes. LightBurn warns that a wrong value shrinks or stretches the output.
- On a Ruida controller, press OK and power-cycle the controller so the settings take effect.
- Level the cup so the band you engrave is parallel to the bed, then focus on its top surface.
Fiber galvo lasers work differently: LightBurn marks the design in slices and turns the cup between them. Split Size sets the slice length, and smaller slices help on tapered or irregular cups. Overlap hides gaps between slices: LightBurn suggests a small overlap when removing a coating, but warns that overlaps can show when marking bare steel.
Tapered tumblers
Most tumblers narrow toward the base. Both ends turn through the same angle, but the narrow end has less surface per turn, so artwork near it comes out narrower. If the band you engrave measures 90 mm across at the top and 75 mm at the bottom, the bottom edge of a design comes out 75 ÷ 90 = 83 percent as wide as the top.
What LightBurn offers:
- Object Diameter: use the largest end of the taper.
- Taper Warp (Laser Tools, Taper Warp): enter where the top of the object is, its Top Diameter, Length and Bottom Diameter, in millimetres, and LightBurn pre-distorts the artwork to compensate. It corrects size only, not focus distance, and it expects the surface you engrave to sit parallel to the bed. For Length, one forum user measured vertical height, table top to rim (February 2024).
- Level the surface: raise the narrow end until the line you engrave is parallel to the bed. A four-wheel rotary does this by raising one pair of wheels; OMTech notes its own chuck-style rotary lacks that adjustment.
On xTool machines, the RA2 Pro rotary has chuck and roller modes for regular and irregular cups, and xTool says the S1 adjusts its Z axis to follow curved surfaces.
Size the wrap
Measure your own cup with calipers at the band you will engrave, rather than trusting a listing. The math is one line: circumference = π × diameter.
A worked example, with calipers reading 80.0 mm at the band:
- Circumference: π × 80.0 = 251.3 mm. A full wrap is 251.3 mm long in the direction of rotation.
- Orientation: in LightBurn, a full-wrap graphic's height should match the Circumference field. In xTool Creative Space, the circumference is the pattern's height and the cup's height is its width.
- Handle: if the handle mounts take 40 mm of the band, your design gets 251.3 minus 40 = 211.3 mm. Leave a few millimetres clear at each end, or take the handle off: xTool and OMTech both remove tumbler handles with a screwdriver before engraving.
- Seam: a 0.5 mm error in diameter moves the seam by π × 0.5 = 1.6 mm, which shows on a full wrap. Put the seam behind the handle or leave a deliberate gap.
- Check the fit: OMTech suggests wrapping a paper print around the cup first.
Settings to start from
Our settings finder does not list powder coat yet; its fiber stainless row covers bare steel and its anodized aluminium rows cover anodized bottles. For powder coat, start from these reported numbers.
Powder coat removal:
| Laser | Reported setting | Source |
|---|---|---|
| CO2 60 W (OMTech), Yeti | 30%, 300 mm/s, 390 DPI, 1 pass | OMTech Yeti guide (April 2026) |
| CO2 80 W (OMTech) | 15% min, 25% max, 300 mm/s, 0.1 mm interval | LightBurn forum, used on over 100 cups (March 2023) |
| CO2, most machines | 50 to 80%, 200 to 300 mm/s, 300 to 500 LPI | OMTech Stanley guide (September 2025) |
| CO2 60 W (Thunder Nova) | 60%, 1,200 mm/s, 300 DPI | Thunder Laser chart, coated metals |
| Diode, xTool D1 on a chuck rotary | 55%, 3,000 mm/min (50 mm/s) | LightBurn forum (July 2022) |
| Fiber | Not listed | Dial in on sacrificial cups (LightBurn forum) |
Bare stainless:
| Laser | Starting setting | Source |
|---|---|---|
| Fiber 20 to 100 W, dark anneal | 40 to 60%, 15 to 250 mm/s, 20 to 50 kHz, 0.015 to 0.025 mm, lens raised 3 to 5 mm | OMTech |
| Fiber 20 to 30 W, dark mark | 80%, 800 to 1,000 mm/s, 30 kHz, 0.01 mm | Depthue settings finder |
| Diode 10 to 20 W with marking compound | 100%, 900 to 1,200 mm/min, 250 LPI, 1 pass | OMTech |
| CO2 with marking spray | 25 W minimum; settings Not listed | OMTech |
OMTech's own two tumbler guides give 30 percent and 50 to 80 percent CO2 power for similar jobs, and our fiber row runs faster at higher power than OMTech's defocused annealing chart. That is the best argument for a test. The logic that carries over:
- Use the least power that lifts the coat cleanly. Too much power marks the steel under the coat; forum users report "laser tracks" and residue that will not clean off.
- Find power at a fixed speed. The method suggested in the xTool D1 thread: run a power test at 3,000 mm/min, then pick the lowest power where the steel shows through bright.
- Fix lines with scan settings, not power. For streaky fills, forum users point to LightBurn's Scanning Offset Adjustment, or turning off bidirectional scanning, before changing power.
- Test on the real thing. Use a spare cup of the same brand and color, or an inconspicuous spot (OMTech).
In the grid planner, pick your laser family and set a range around the rows above. For a 10 W diode, try 30 to 100 percent at 2,000 to 4,000 mm/min; for a 60 W CO2, 10 to 40 percent at 200 to 400 mm/s. The reasoning behind the grid is in laser power and speed settings.
Full wraps or logos
- Logos and names sit on one face: shorter jobs, no seam to hide, and a roller rotary is fine.
- Full wraps must match the circumference, or the circumference minus the handle zone. They run longer, which gives a roller more chances to slip, so a chuck is the safer choice.
- Photos on dark powder coat behave like photos on slate or glass: the engraved area is lighter than the coat. Invert the photo with LightBurn's Negative Image and use a dither mode such as Jarvis, which LightBurn calls generally the best for photos.
- On a galvo, LightBurn's "Run whole shapes, if possible" option avoids cutting letters across slices.
Cleaning and finishing
- Let the cup cool before handling it (OMTech).
- Wash off the residue with water and a sponge. xTool says water is usually enough; one forum user adds dish soap and a melamine pad (a Mr. Clean Magic Eraser).
- Brighten haze or faint discoloration with a magic eraser or stainless steel polish (OMTech).
- Use solvent sparingly. Alcohol on a cloth works (xTool), but one forum user warns that scrubbing until the solvent turns sticky can damage the coat. Rinse with warm water after.
- Remove marking spray by rinsing or wiping off the excess with a damp cloth (OMTech).
- Refit the handle.
xTool says most engraved stainless tumblers handle the dishwasher, provided any temporary coating is fully removed first. Check the cup maker's care instructions too.
A QR code on a tumbler
On a dark powder coat, every engraved module shows bright steel. Engrave the code as drawn and you get light modules on a dark cup: an inverted code. Some phones read those and some do not. In a LightBurn forum thread from March 2023, an inverted code on a powder-coated mug scanned with Google Lens and an older iPhone but not with a Samsung S21's reader, so the maker chose to engrave the background instead and leave the coat as the dark modules.
The QR code generator for laser engraving has an invert option for dark materials that does this for you, and exports a vector SVG or DXF in millimetres. Three more checks:
- Calibrate the rotary first. A wrong Steps Per Rotation or roller diameter stretches a square code.
- Mind the curve. A code on a cup bends away from the camera. On an 80 mm cup, a 25 mm wide code wraps through about 36 degrees, and its edge modules look about 5 percent narrower than its center ones. A 50 mm code wraps through about 72 degrees, and its edges look about 19 percent narrower. Smaller codes scan more easily on narrow cups.
- Scan before the batch. Try two phones under your shop lights, because shiny steel can glare.
Pricing basics for sellers
We do not quote what engraved tumblers sell for: it changes with the cup, the region and the sales channel. Build your price from your own costs, then compare with listings where you sell.
| Cost | How to work it out | Example |
|---|---|---|
| Blank | Your supplier's price per cup | $18.99, xTool's listed price for a 40 oz blank with removable handle (as of October 2026) |
| Laser time | Job minutes × your machine rate | 8 min × $0.50 = $4.00 |
| Hands-on time | Setup, proof, cleaning and packing × your labor rate | 12 min × $0.40 = $4.80 |
| Spoilage | Test and failed cups, spread over good ones | 1 failure in 20: about $1.00 per good cup |
| Supplies | Tape, cleaner, marking spray | Your receipts |
| Fees and shipping | Your marketplace's current fee page | Varies |
The example rates are placeholders, not market rates. With them, cost before supplies, fees and shipping is about $28.79; your price sits above that floor.
If customers bring their own cups, price the engraving alone and agree in writing what happens if a cup is ruined. For custom names and logos, send a proof before you engrave; see customer proof approval.
Next step
Buy two spare cups of the brand and color you plan to sell. Measure them with calipers, set up the rotary, run a power test at a fixed speed, and save the winning settings in LightBurn's material library. If you are still choosing software, start with laser engraving software.
Free tools for this job
Frequently asked questions
Can you laser engrave tumblers?
Yes. Powder-coated stainless tumblers engrave on diode, CO2 and fiber lasers, because the laser removes the coat and shows the steel. Bare stainless marks directly on a fiber laser; a CO2 laser needs a marking spray first.
What kind of laser engraver do I need for tumblers?
Any laser with a rotary attachment and enough bed depth for the cup. A diode handles powder coat on a budget, a fiber laser also marks bare steel and works faster than CO2, and a CO2 laser adds glass and plastic cups but needs a spray on bare metal.
What is the best tumbler for laser engraving?
A powder-coated stainless tumbler sold as a laser blank, with straight walls where you engrave and a removable handle. Stick with one brand and color, because coat thickness changes the settings.
How much does it cost to laser engrave a tumbler?
Your cost is the blank, plus laser minutes at your machine rate, hands-on time, a spoilage allowance and marketplace fees. Set your price above that floor after checking what comparable engraved cups sell for where you sell.
Why is my tumbler engraving not bright silver?
Often too much power, which marks the steel under the coat and leaves residue that will not clean off. Lower the power at a fixed speed until the coat lifts cleanly, then wash with dish soap and a melamine sponge.
Sources
- xTool, Best Laser Engraver for Tumblers
- xTool, Yeti Laser Engraving: How to Laser Engrave a Yeti Cup
- xTool, Stainless Steel Laser Engraving: The Ultimate Guide
- xTool, How to Make Personalized Tumblers?
- xTool, How to Do Powder Coating with Laser Engraving?
- OMTech, Mastering Laser Engraving Yeti Tumblers: A Beginner's Guide
- OMTech, Stanley Cup Engraving: A Complete Beginner's Guide
- OMTech, 3 Essential Steps to Successfully Laser Engrave Using a Rotary Attachment
- OMTech, Glass Laser Engraving for Beginners: How to Engrave Glass Cups
- OMTech, Metal Laser Marking Spray for CO2 Laser Engravers
- OMTech, Best Laser Engraving Stainless Steel Settings (Fiber and Diode)
- Thunder Laser, CO2 laser settings for cutting and engraving
- LightBurn documentation, Rotary Mode
- LightBurn documentation, Rotary Mode (GCode)
- LightBurn documentation, Rotary Mode (DSP)
- LightBurn documentation, Rotary Mode (Galvo)
- LightBurn documentation, Taper Warp
- LightBurn documentation, Image Mode
- LightBurn forum, Tumbler setting for xTool D1
- LightBurn forum, Engraving Yeti cups
- LightBurn forum, Engraving powder coated tumblers
- LightBurn forum, Galvo laser settings on tumblers
- LightBurn forum, LightBurn settings for rotary Yeti
- LightBurn forum, Taper Warp tool for rotary engraving
- LightBurn forum, QR code on powder coat travel mug